One of the things I enjoy most about amateur radio is that you don’t necessarily need a large antenna tower, an expensive station or even a dedicated shack to make interesting contacts. Sometimes, all you need is a radio, a battery, a small portable antenna and somewhere to set it up.
As a relatively new HF radio amateur, I’ve been experimenting with different ways of getting on the air. One of the antennas I’ve been using is the JPC-12 portable HF vertical antenna, sometimes sold under the Chelegance name and often associated with the similar PAC-12 antenna design.
I’ve now taken it out several times. I’ve used it on a tripod on my terrace, mounted it on a ground spike during a trip to the Danish island of Samsø, and brought it into the forest for some portable HF operating. And the best part? I’ve actually made some nice contacts with it, including Alan, 2I0EVH, and two Italian radio amateurs, IU2EFB and IW2NRI.
This isn’t a laboratory antenna review with expensive measuring equipment. It’s simply my experience using the JPC-12 in the real world, along with some practical information that might be useful if you’re considering a portable vertical antenna for HF, POTA (Parks on the Air), camping or general outdoor amateur radio.
The rest of my station is described in my portable ham radio backpack with the IC-7100 and a 30Ah LiFePO4 battery.
JPC-12 at a Glance
- Antenna type: portable multiband HF vertical.
- Setup: ground spike or a suitable tripod, with ground radials.
- My measured 20m SWR: approximately 1.2–1.3 around 14.2 MHz.
- Tuning reference: 40–10m starting coil positions and whip settings.
- My operating locations: the terrace, Samsø and the forest.
Why I Like the Idea of Portable HF Radio
For quite a few years after getting my amateur radio licence in 2018, most of my radio activity was on VHF and UHF. Getting started on HF opened up an entirely different part of the hobby. Suddenly, I could hear radio amateurs from other countries, sometimes thousands of kilometres away. And I discovered that a relatively simple setup could be enough to make contacts far beyond Denmark.
But there’s a practical challenge when you want to operate away from home. You need an antenna. A permanent wire antenna or a large dipole can be a great solution at home, but it’s not always convenient to bring along when you’re going somewhere for just a few hours.
I wanted something that could fit in a bag, be assembled quickly and work on several HF bands without spending half the afternoon adjusting it. That’s where the JPC-12 came in.
What Is the JPC-12 / PAC-12 Portable Vertical Antenna?
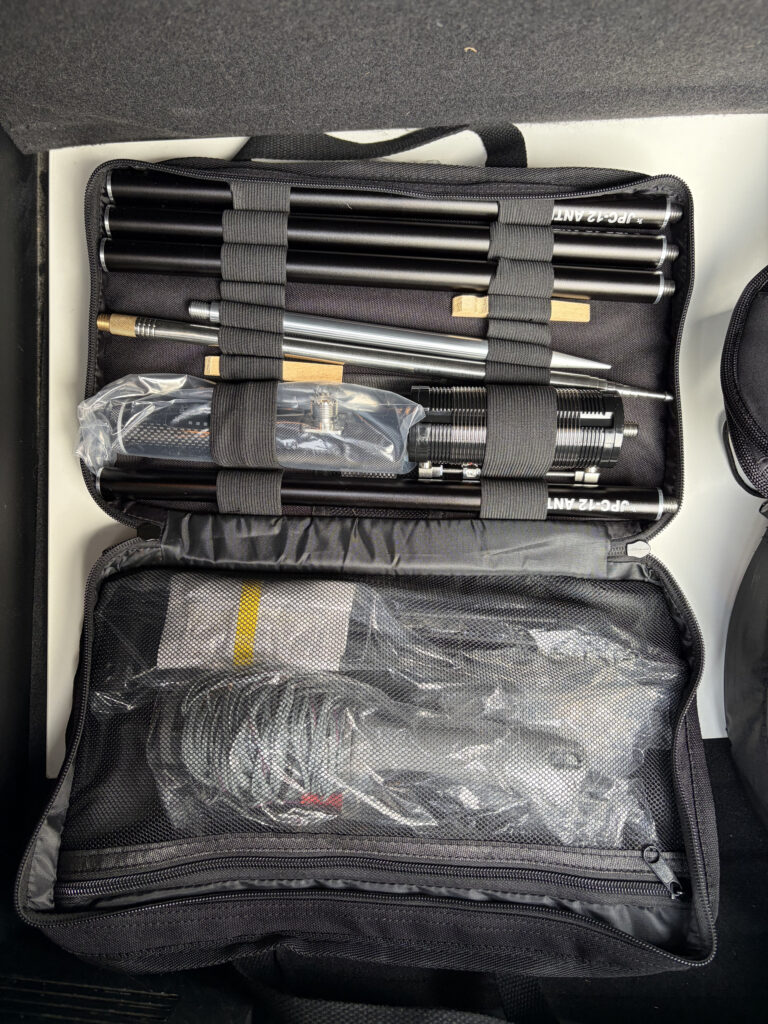
The JPC-12 is a compact, multiband portable vertical HF antenna. It’s based on a fairly simple design: a vertical radiator, an adjustable loading coil and a set of ground radials that provide the counterpoise. The antenna consists of several screw-together aluminium sections, a telescopic stainless-steel whip, an adjustable loading coil, a feedpoint assembly and a ground spike. A radial system and carrying bag are also normally included.
The original Pacific Antenna PAC-12 has different components from the JPC-12 described here. Check your own kit and manual rather than assuming that tuning settings are interchangeable between antennas sold under these names.
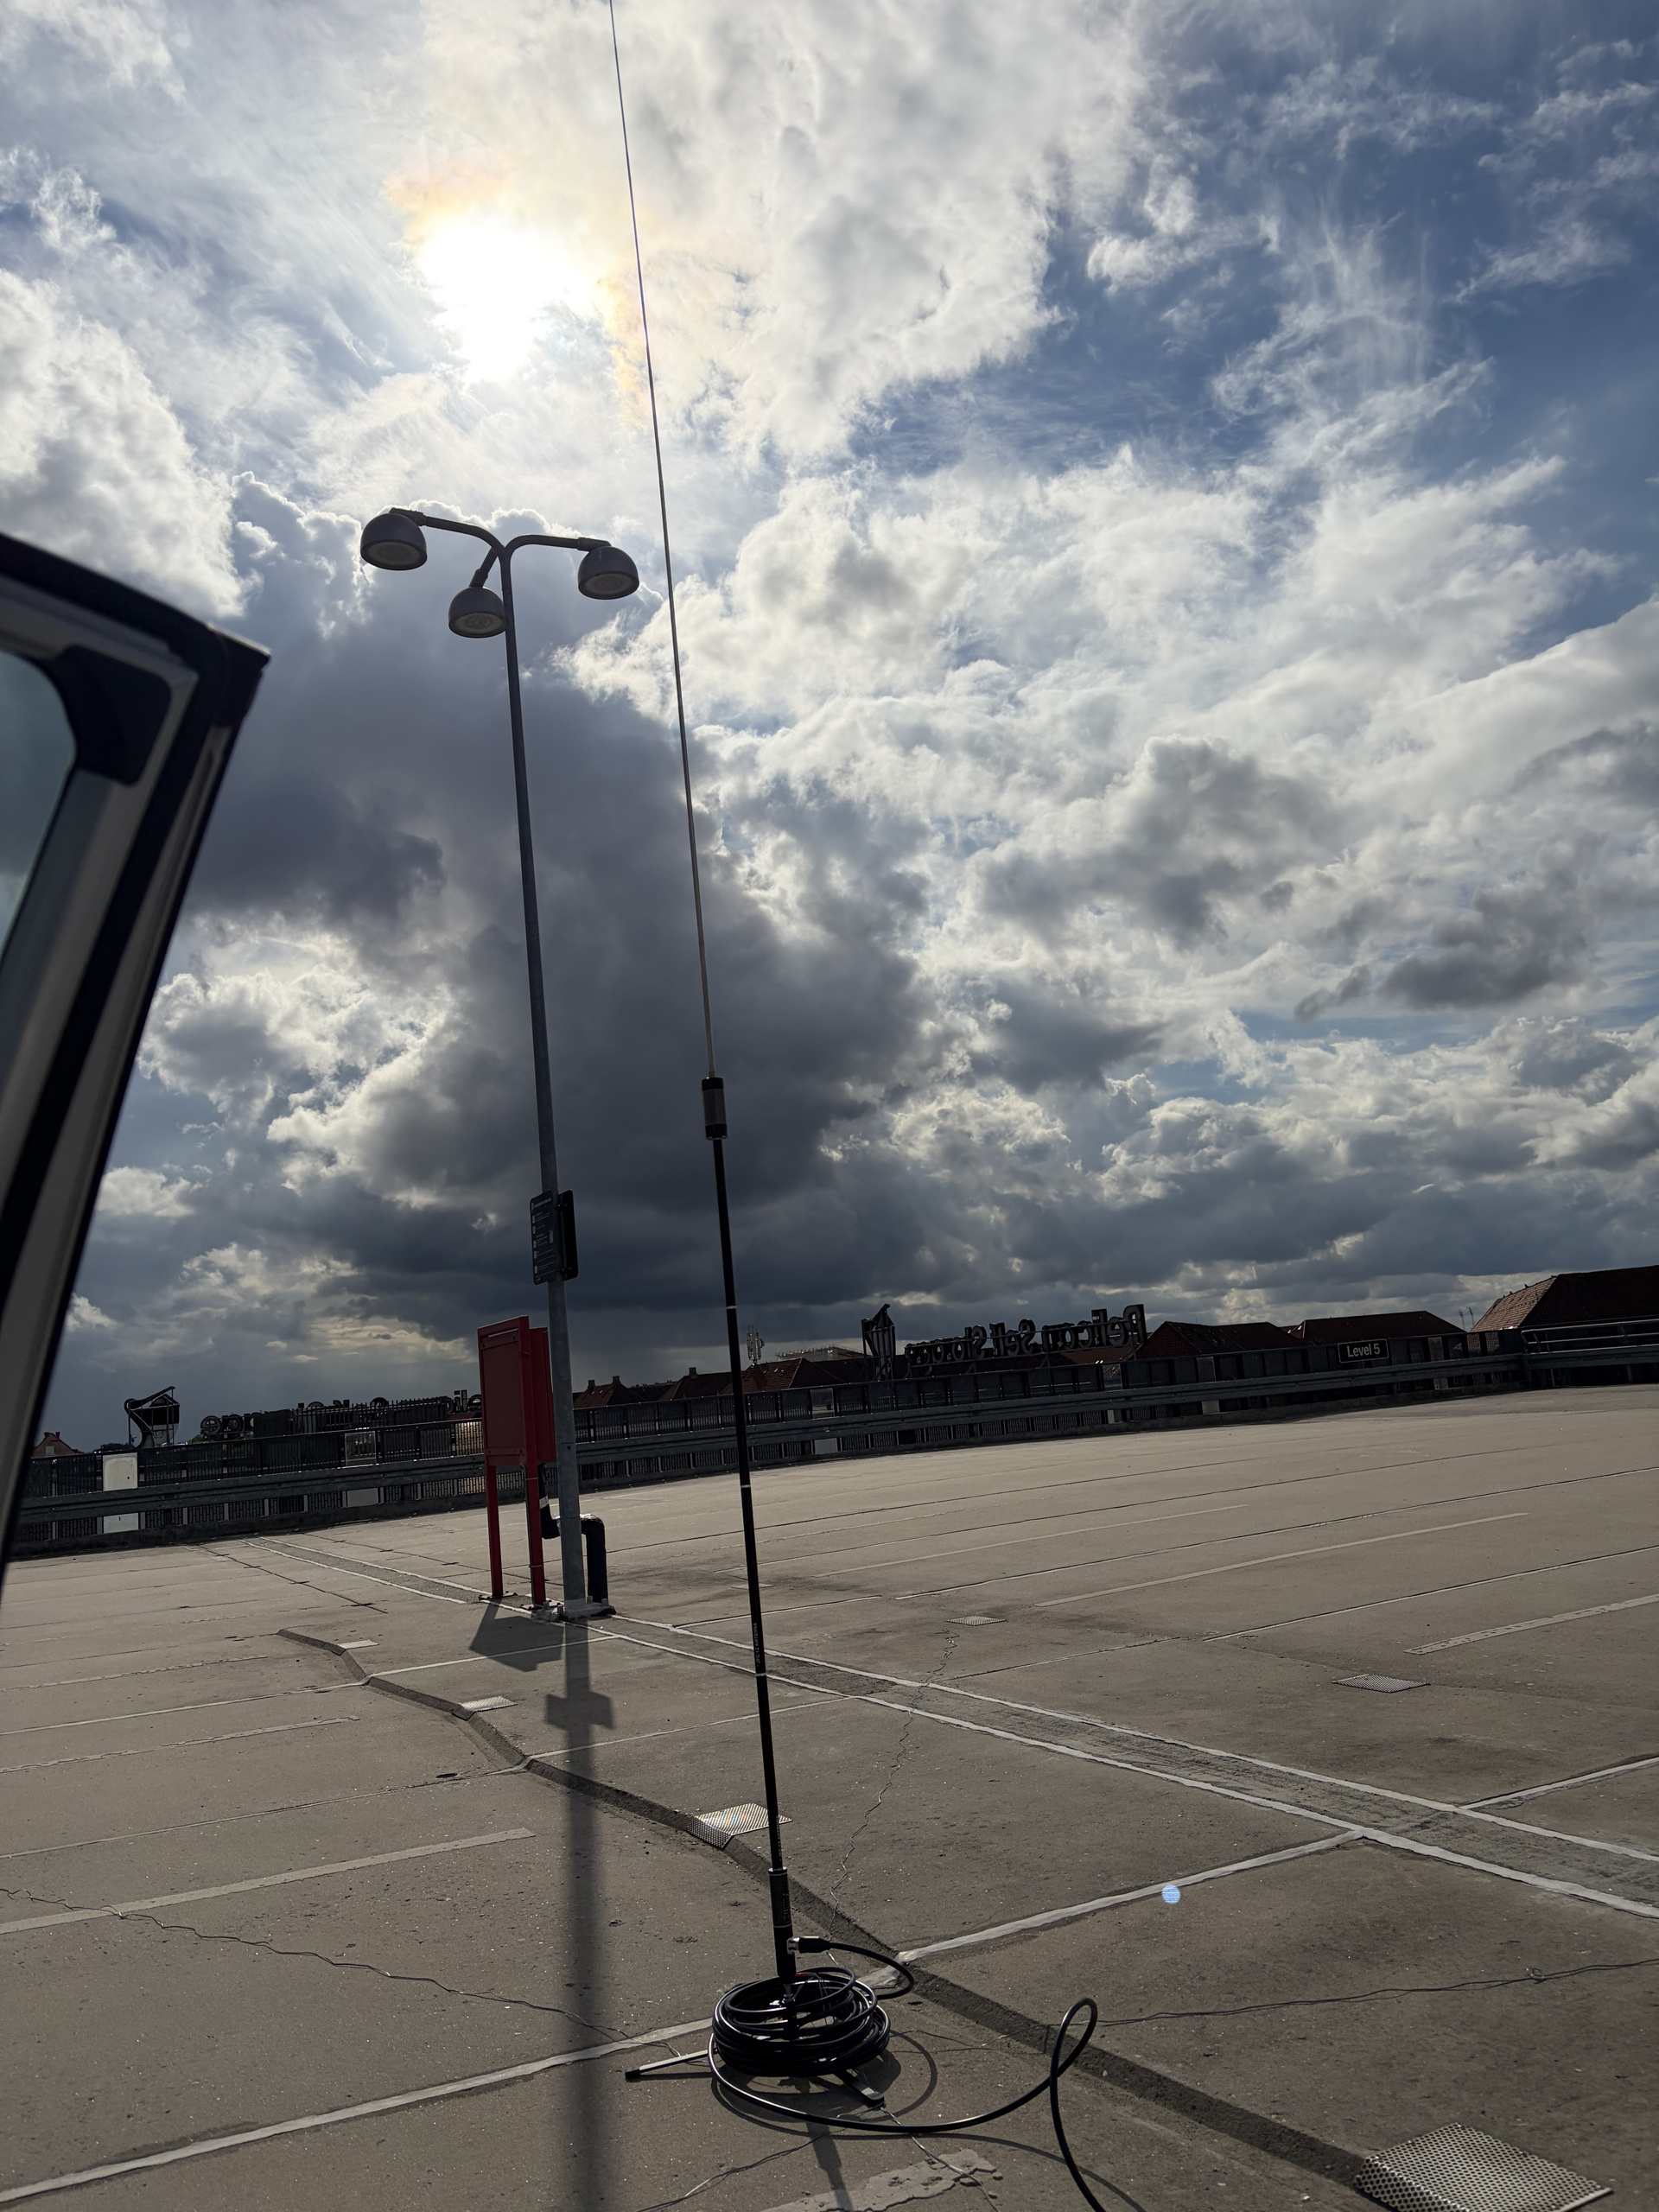
When assembled in its standard configuration, the antenna is approximately 4 metres tall, although the exact height depends on the version and how far the telescopic whip is extended. The loading coil allows the antenna to operate on lower HF frequencies where the physical radiator would otherwise be too short for resonance. Depending on the configuration, the JPC-12 can be adjusted for the amateur bands from 40 metres through 10 metres. That includes:
- 40 metres – 7 MHz
- 30 metres – 10 MHz
- 20 metres – 14 MHz
- 17 metres – 18 MHz
- 15 metres – 21 MHz
- 12 metres – 24 MHz
- 10 metres – 28 MHz
For someone interested in portable HF radio, that’s a useful selection of bands from one relatively small antenna. It’s also the reason this type of antenna is popular with radio amateurs looking for a lightweight POTA antenna, a camping antenna or a portable multiband HF setup. You don’t need a tree, a permanent mast or a large area to install it. You do, however, need a little space for the ground radials.
My First Setup – JPC-12 on a Tripod on the Terrace
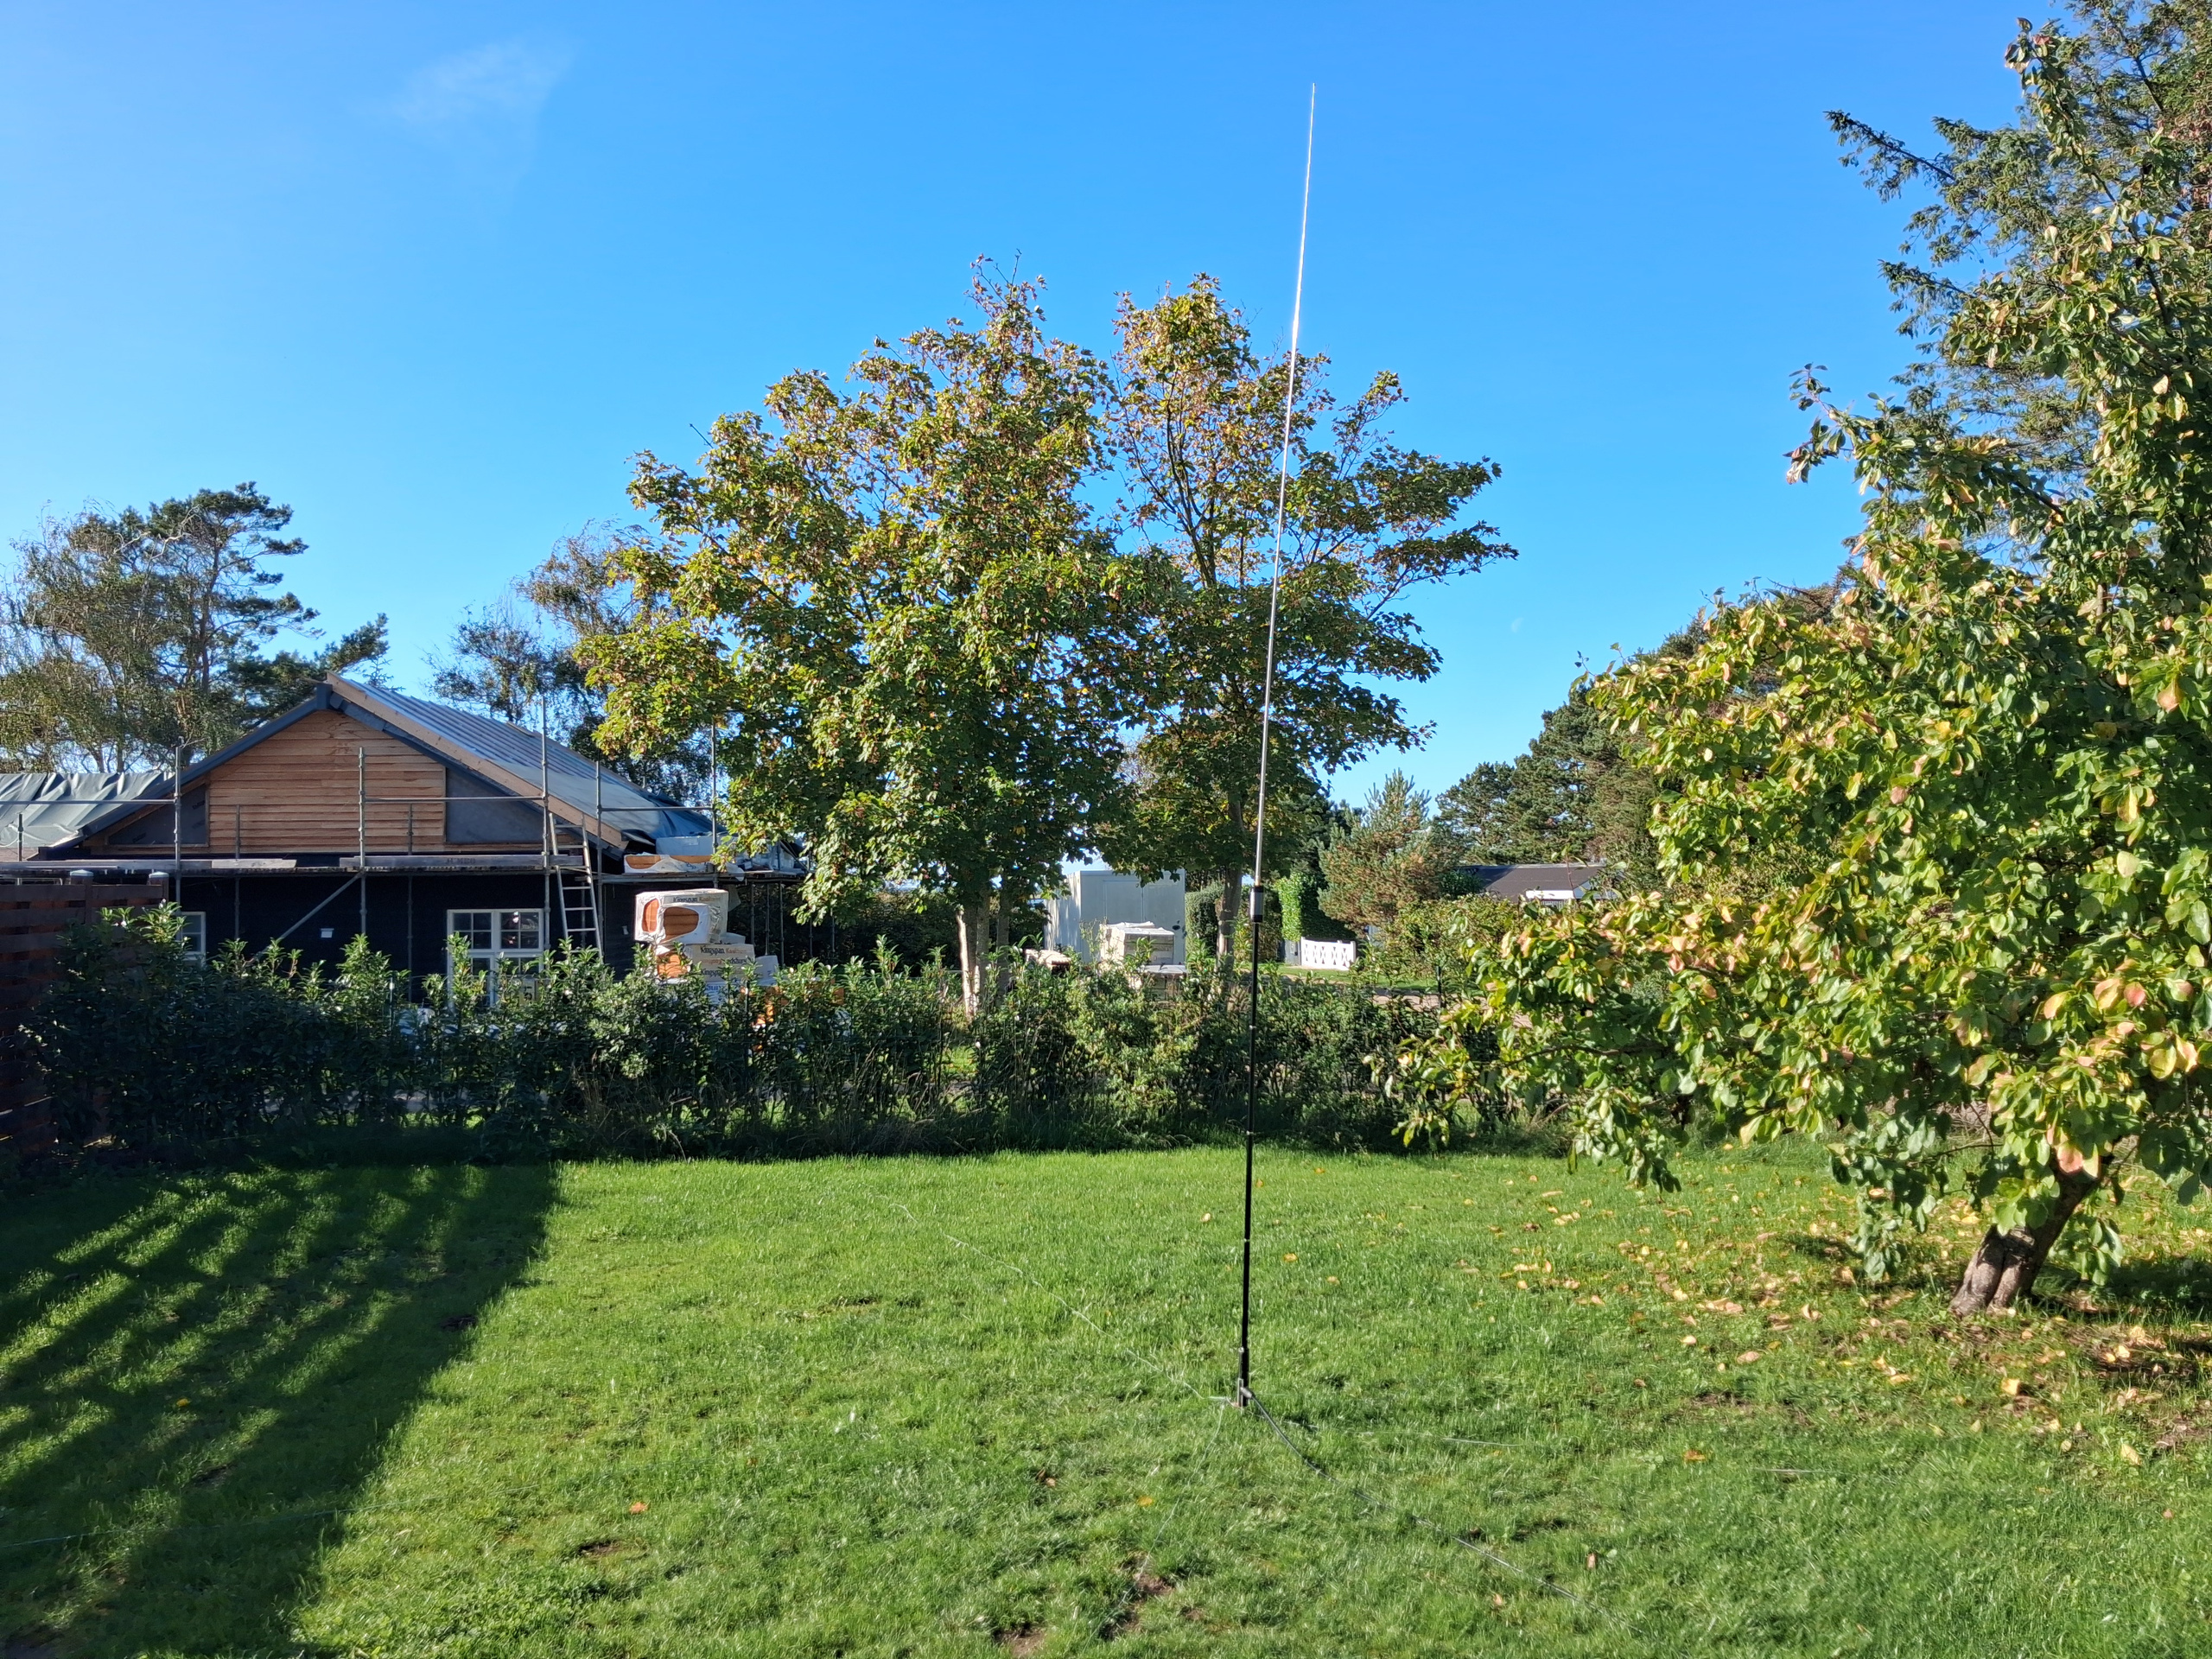
One of the first places I experimented with the antenna was on my terrace. Instead of using the supplied ground spike, I mounted the JPC-12 on a small tripod. This is quite a practical solution when you’re operating somewhere you cannot simply push a metal spike into the ground.
A terrace, balcony, paved area or similar location may not be ideal for a ground-mounted vertical antenna, but a stable tripod provides another way to support it. The important thing is that the antenna remains upright, with the radial or counterpoise system connected properly. My portable radio is an Icom IC-7100, and I use a LiFePO4 battery when operating away from a normal power supply.
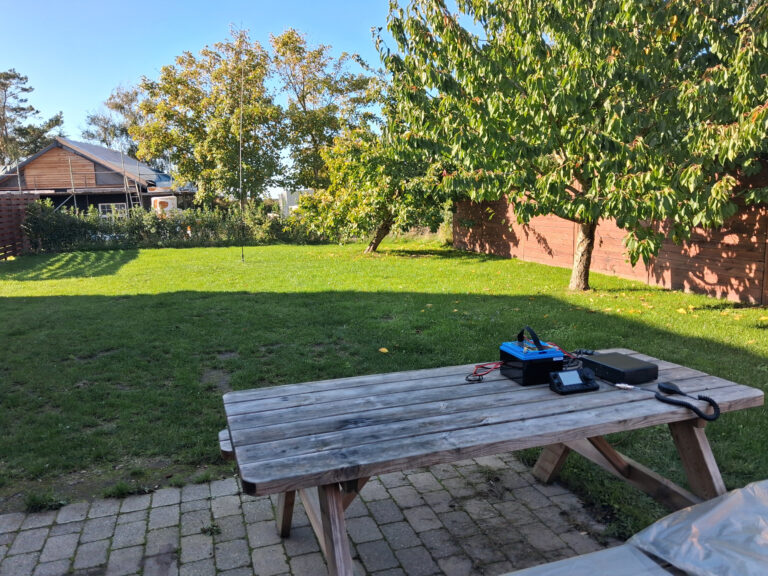
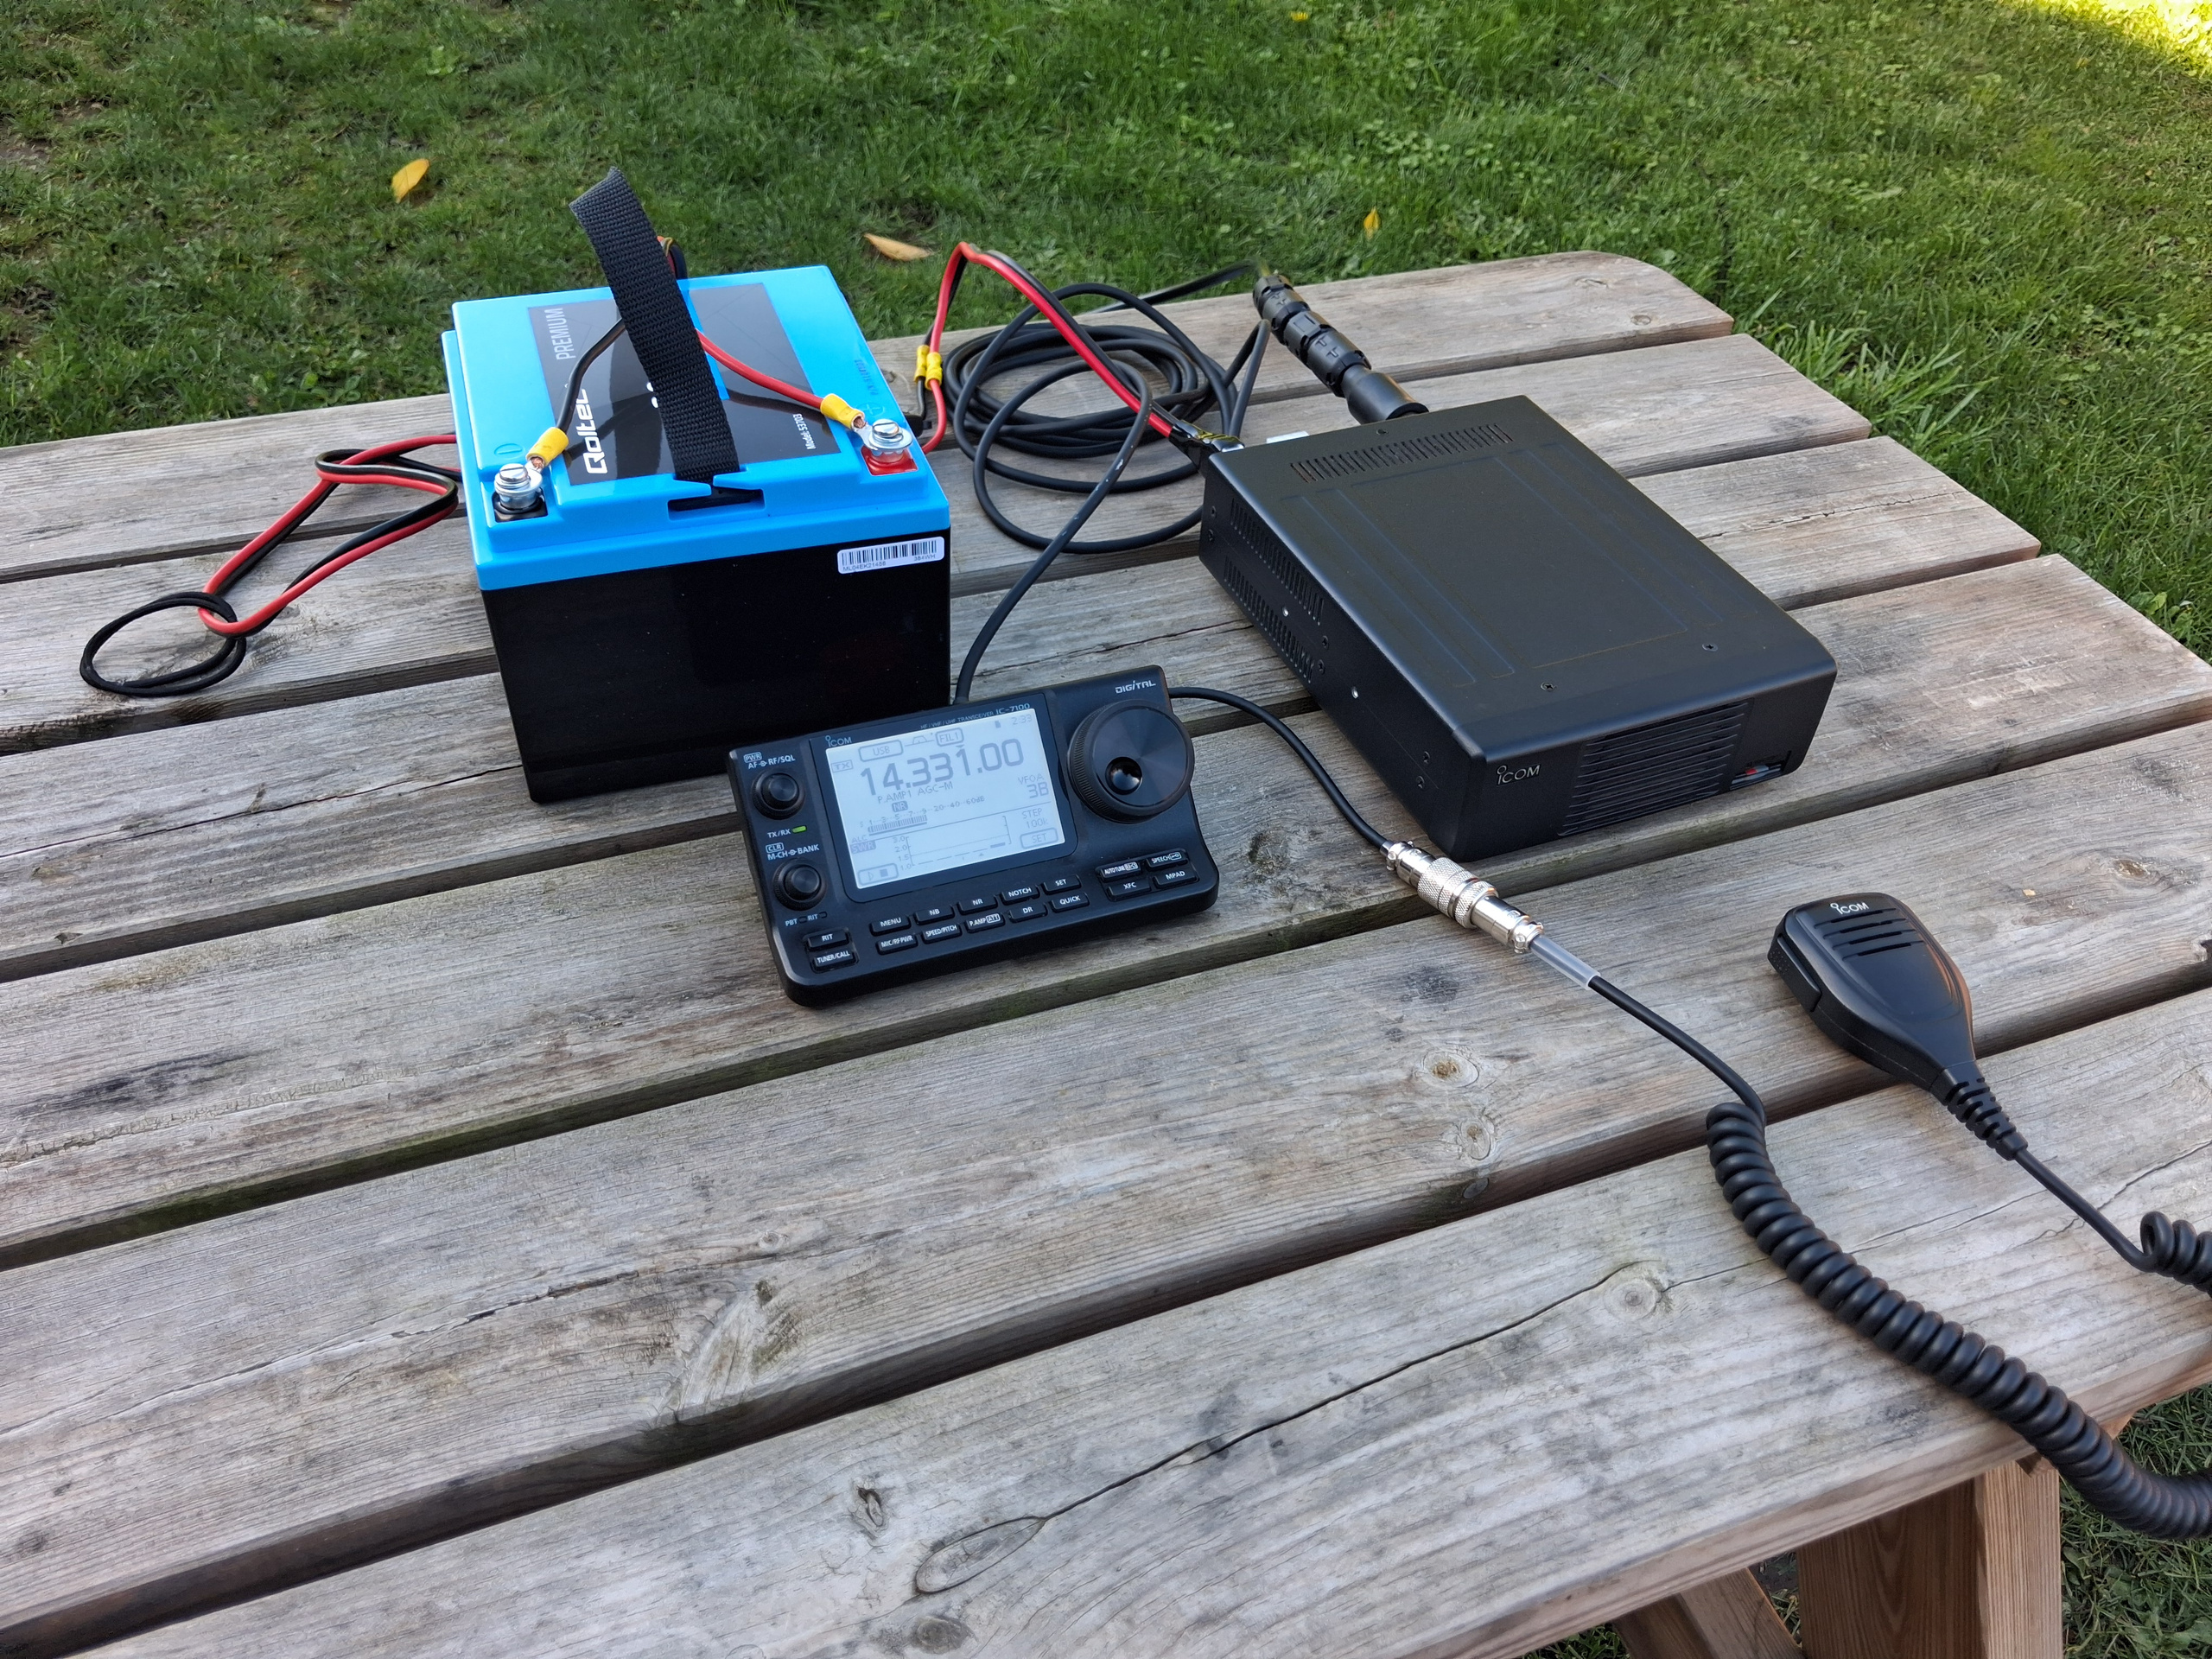
One of the first things I noticed about the JPC-12 was how straightforward the antenna was to assemble. The aluminium sections screw together, the loading coil fits between the lower sections and the telescopic whip, and the whip can be extended to the required length. Once the antenna is standing, the remaining job is to adjust the loading coil and check the SWR.
My JPC-12 SWR on 20m
On 20 metres, I’ve managed an SWR of approximately 1.2–1.3 around 14.2 MHz, which I’m quite happy with for a portable antenna. Of course, a low SWR doesn’t tell the whole story about antenna efficiency, but it’s a good starting point for getting the radio safely on the air. And it’s rather satisfying to look out onto the terrace and see a complete HF antenna standing there, knowing that it took very little equipment to set it up.
Taking the JPC-12 to Samsø – A QSO with Alan, 2I0EVH
One of the nice things about portable amateur radio is that you can take your station along when visiting somewhere else. I brought the JPC-12 with me to Samsø, a Danish island in the Kattegat.
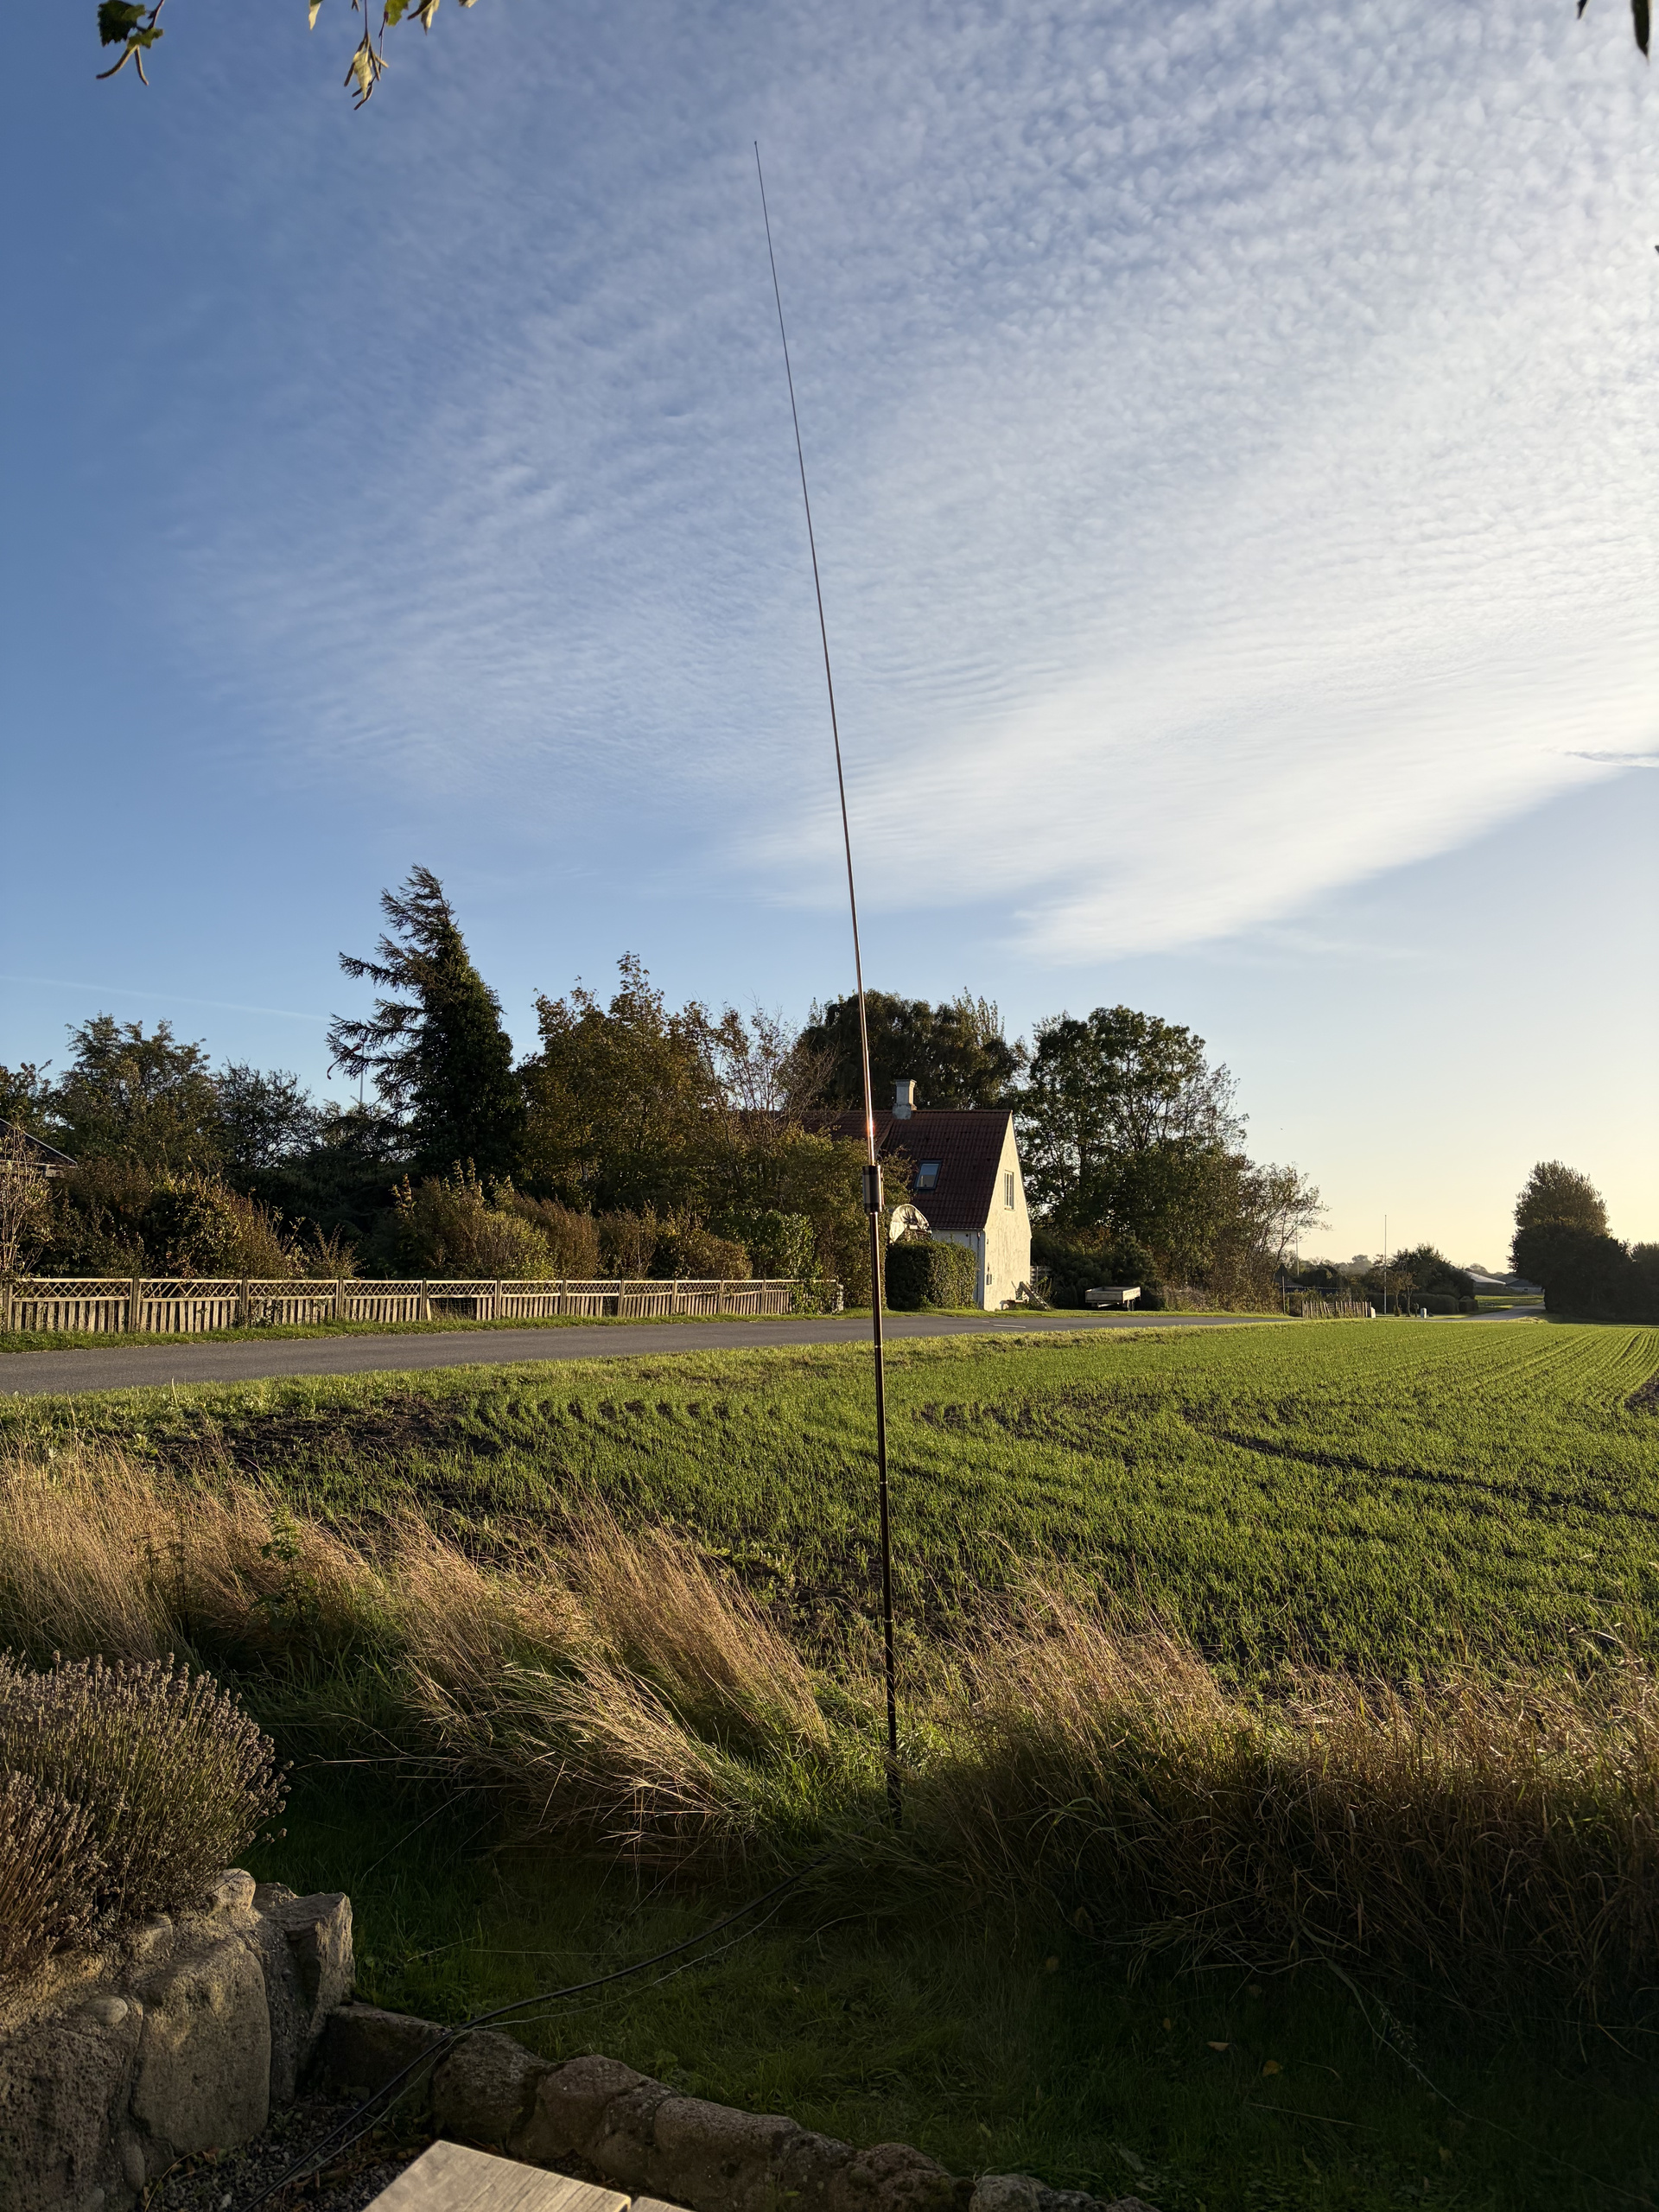
This time, I used the ground spike instead of the tripod. That’s really how the antenna is intended to be used. The spike goes into the ground, the feedpoint and aluminium sections are assembled above it, and the ground radials are spread out around the base. It’s a simple arrangement. There is no need to find a suitable tree, throw a line over a branch or install a large mast.
Once everything is assembled, you adjust the antenna for your chosen band, check the SWR and you’re ready to listen or call CQ. During my time on Samsø, I made a contact with Alan, 2I0EVH.
For me, that’s what makes portable HF interesting. You take a few pieces of aluminium, a telescopic whip, some wire and a radio to a different location. A short while later, you’re talking to another radio amateur somewhere else. It still fascinates me that this works so well with such a simple setup. And it makes the effort of bringing the radio equipment along worthwhile.
Portable HF in the Forest – Working IU2EFB and IW2NRI in Italy
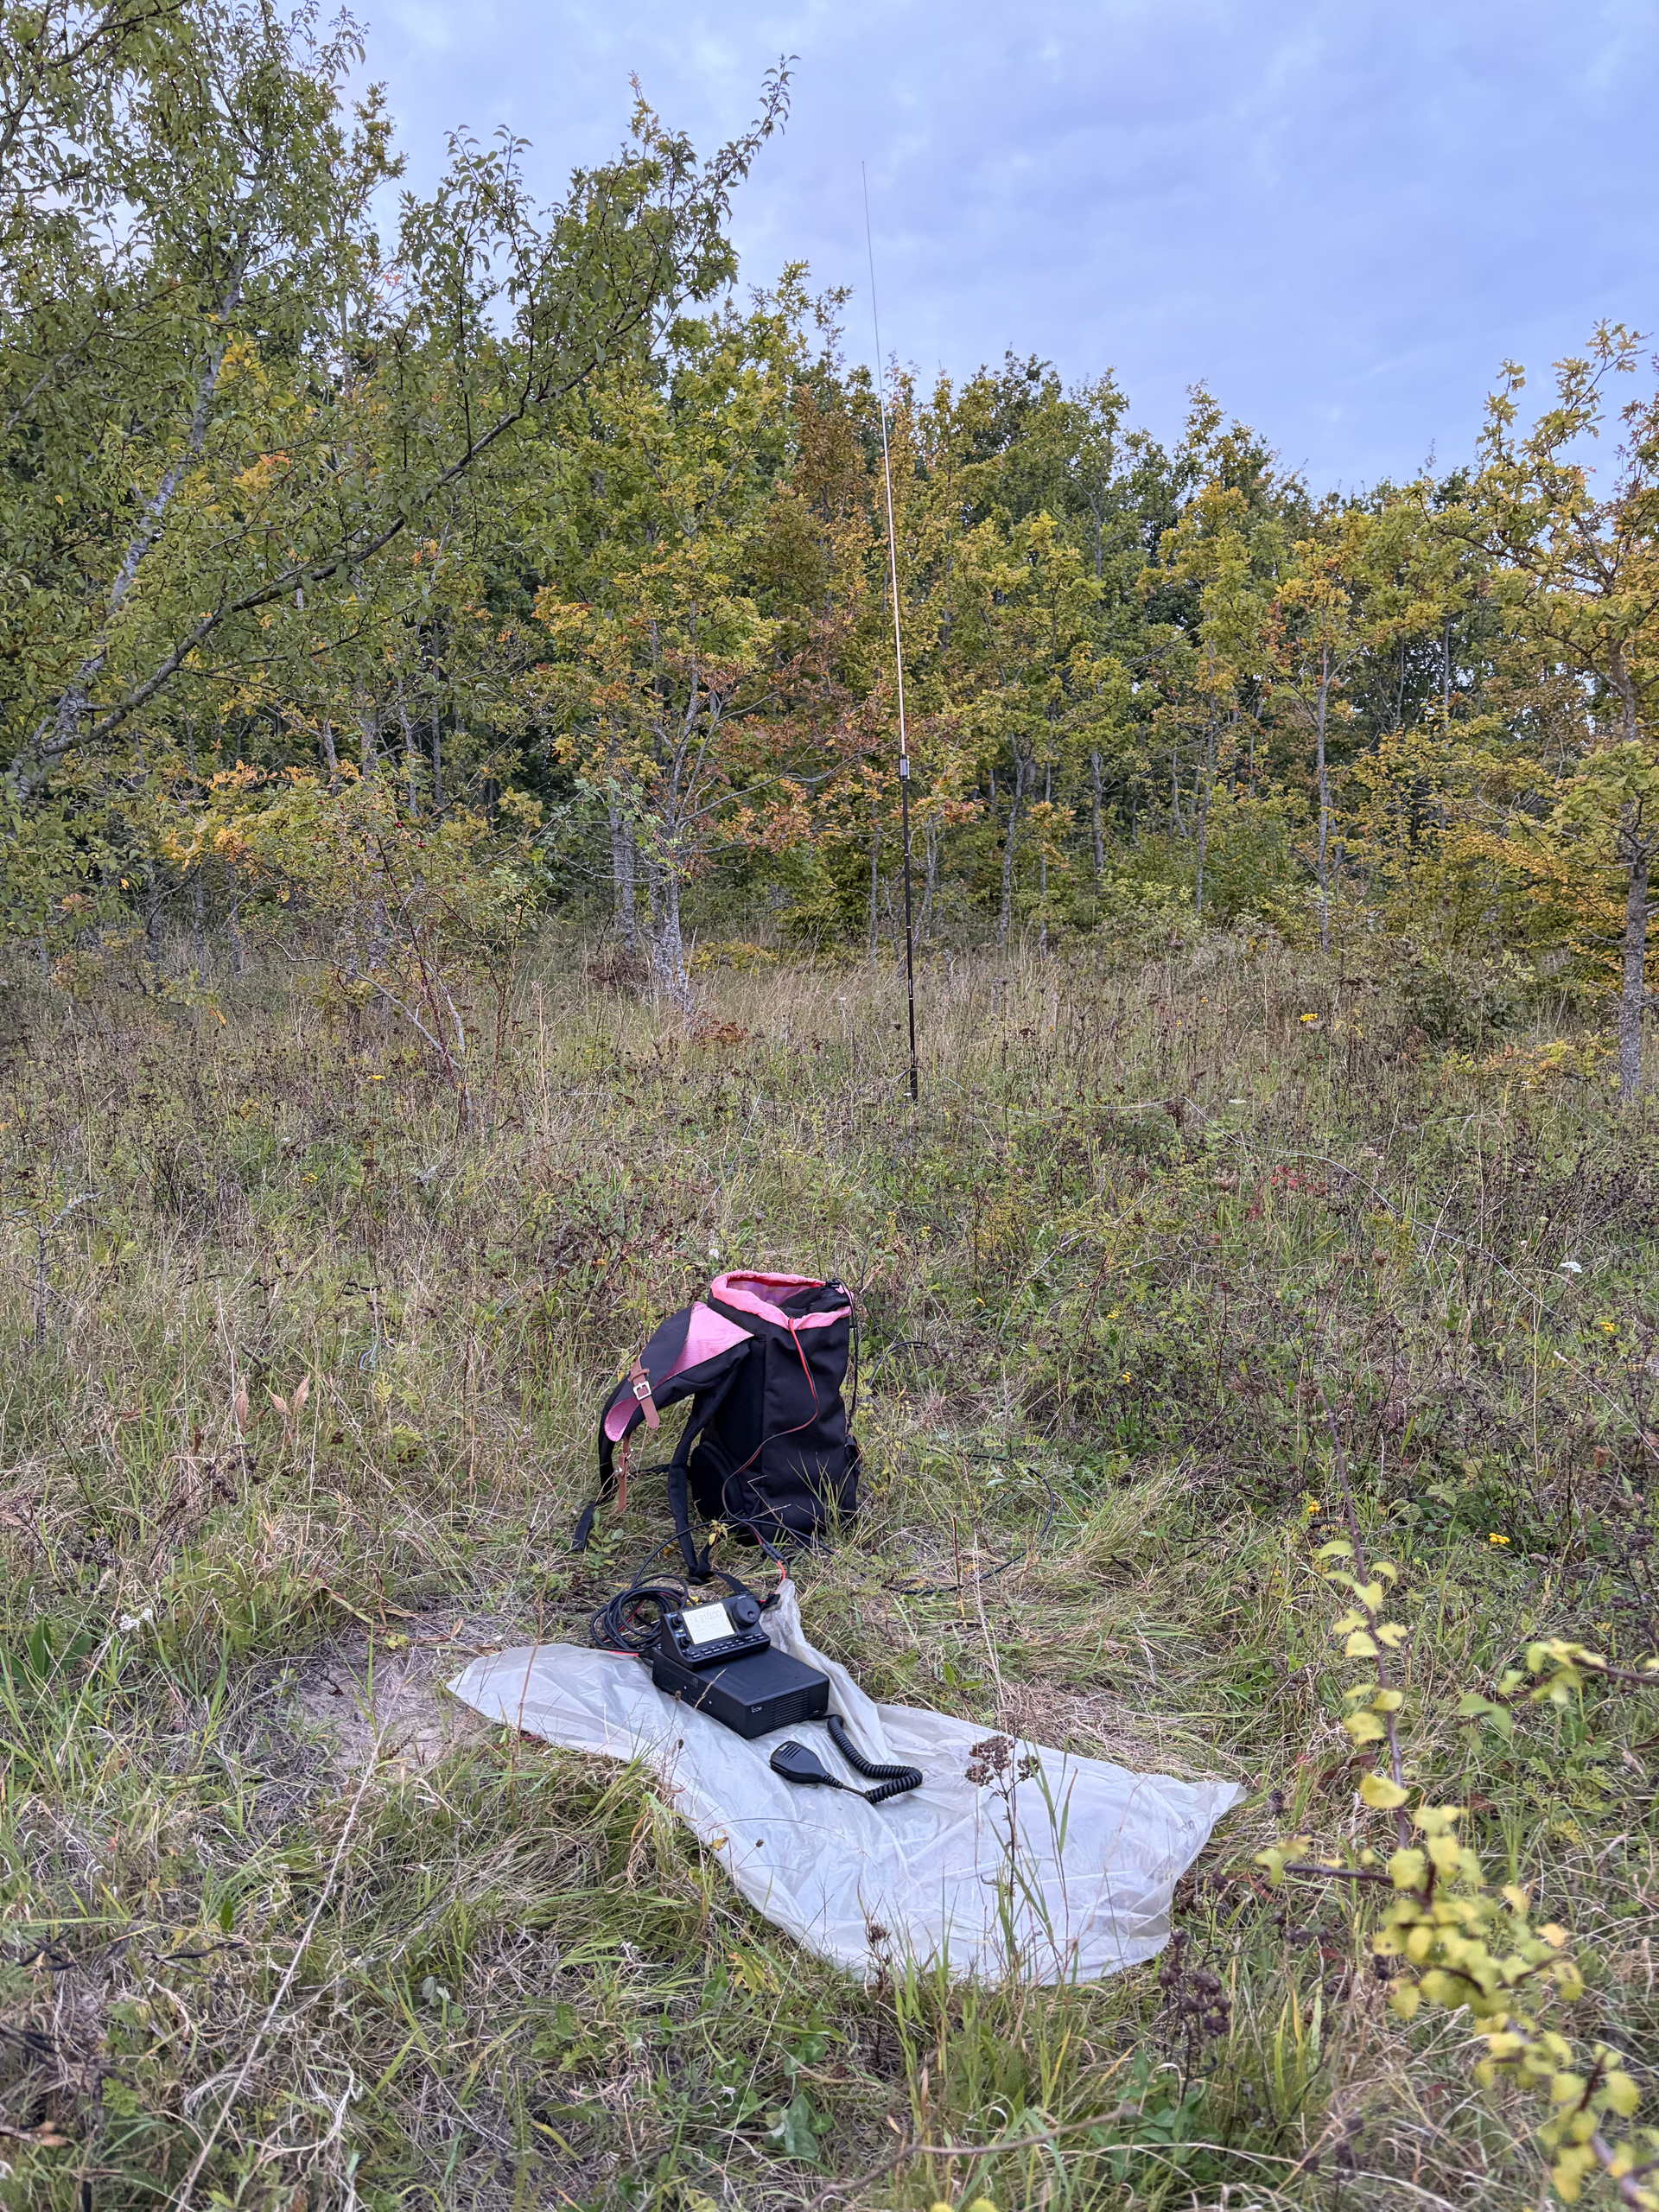
Another outing took me into the forest. I like the idea of being able to set up a small HF station in a quiet outdoor location, away from some of the electrical noise that can make radio reception difficult in built-up areas. The JPC-12 is well suited to this kind of operating because it doesn’t require much space or complicated equipment. It can be assembled in a clearing, provided there is enough room for the vertical whip and the radials.
During this outing, I made QSOs with two Italian amateur radio stations: IU2EFB and IW2NRI. Making contacts with Italy from a portable station in a Danish forest was a very enjoyable experience.
For someone still gaining experience with HF operating, every successful contact is also an opportunity to learn. You get a better feeling for band conditions, antenna placement, signal strength and how the equipment behaves in different locations. And there’s something special about making an international SSB contact while sitting outside with a relatively simple portable station. It’s a different experience from sitting at home in front of a computer.
How Easy Is the JPC-12 to Set Up?
This is probably one of the biggest advantages of the antenna. After using it a few times, the whole process becomes quite familiar. My normal approach is to choose a suitable location, install the ground spike or tripod, assemble the vertical sections, extend the whip and arrange the radials. Then I adjust the loading coil for the band I want to use.
The coil has a movable contact that changes the effective inductance of the antenna. For the lower HF bands, more inductance is generally needed. On the higher bands, less inductance is required, and the physical length of the whip becomes increasingly important. Initially, finding the correct coil position may seem a little confusing.
But there’s a useful shortcut. I found a JPC-12 antenna setup cheat sheet that lists approximate coil positions, the number of aluminium sections to use and the required telescopic whip extension for each band. With that guide, it’s often possible to get very close to the correct band on the first attempt. That means less time adjusting the antenna and more time actually using the radio.
JPC-12 Antenna Tuning Guide – 40m to 10m
The following table is based on N8JRD’s Chelegance/JPC-12 Antenna Setup Cheat Sheet, which I’ve found useful as a starting point when setting up the antenna. The number of aluminium sections refers to the sections installed below the loading coil.
On a narrow screen, swipe the table sideways to see all four columns.
| HF band | Aluminium sections | Telescopic whip | Starting coil position |
|---|---|---|---|
| 40m | 4 | Fully extended | 8 turns up from bottom |
| 30m | 4 | Fully extended | 15 turns down from top |
| 20m | 4 | Fully extended | 7 turns down from top |
| 17m | 2 | Half a segment retracted | 5 turns down from top |
| 15m | 0 | Fully extended | 4 turns down from top |
| 12m | 0 | 2 segments retracted | 4 turns down from top |
| 10m | 0 | 1 segment retracted | 3 turns down from top |
Source: N8JRD’s original post and original setup sheet. These are his suggested starting positions, separate from my own 20m SWR measurement above.

For 40 metres below 7.175 MHz, the original guide suggests starting at 7 turns up from the bottom instead of 8. The guide counts the half-turn at either extreme end of the coil.
Count coil windings, not an assumed number of clicks or coloured marks. Here, the top is the whip end and the bottom is the aluminium-section end. Keep the loading coil installed for every configuration in this table; zero aluminium sections does not mean removing the coil.
The Chelegance JPC-12 manual describes 40–6m coverage and different example settings, including whip adjustments. It also documents a revised coil contact. This 40–10m table is therefore one practical reference, not every possible configuration or a substitute for the instructions supplied with your version.
Important: These are starting positions, not guaranteed settings for every JPC-12 or PAC-12 antenna. The cheat sheet assumes a ground radial arrangement of five pairs of wires spread around the base in a star pattern. Different radial arrangements, antenna versions, ground conditions and nearby objects can change the resonance. Always check the SWR with an antenna analyser or appropriate low-power measurement before transmitting normally. For my own portable operating, particularly around 20 metres, having these approximate settings available makes the antenna much quicker to prepare.
Why the JPC-12 Ground Radials Matter
When people first look at the JPC-12, most of their attention probably goes to the telescopic whip and loading coil. But the ground radials are an important part of the antenna system. A ground-mounted vertical HF antenna needs a suitable RF return path, often provided by radial wires or a counterpoise. The ground spike is primarily a mechanical support. Simply pushing a metal spike into the soil doesn’t provide the same RF performance as a proper radial system.
The JPC-12 is normally supplied with a ribbon-style radial assembly that can be spread out around the base. My radial wires are approximately 5 metres long, and I arrange them around the antenna as the available space allows.
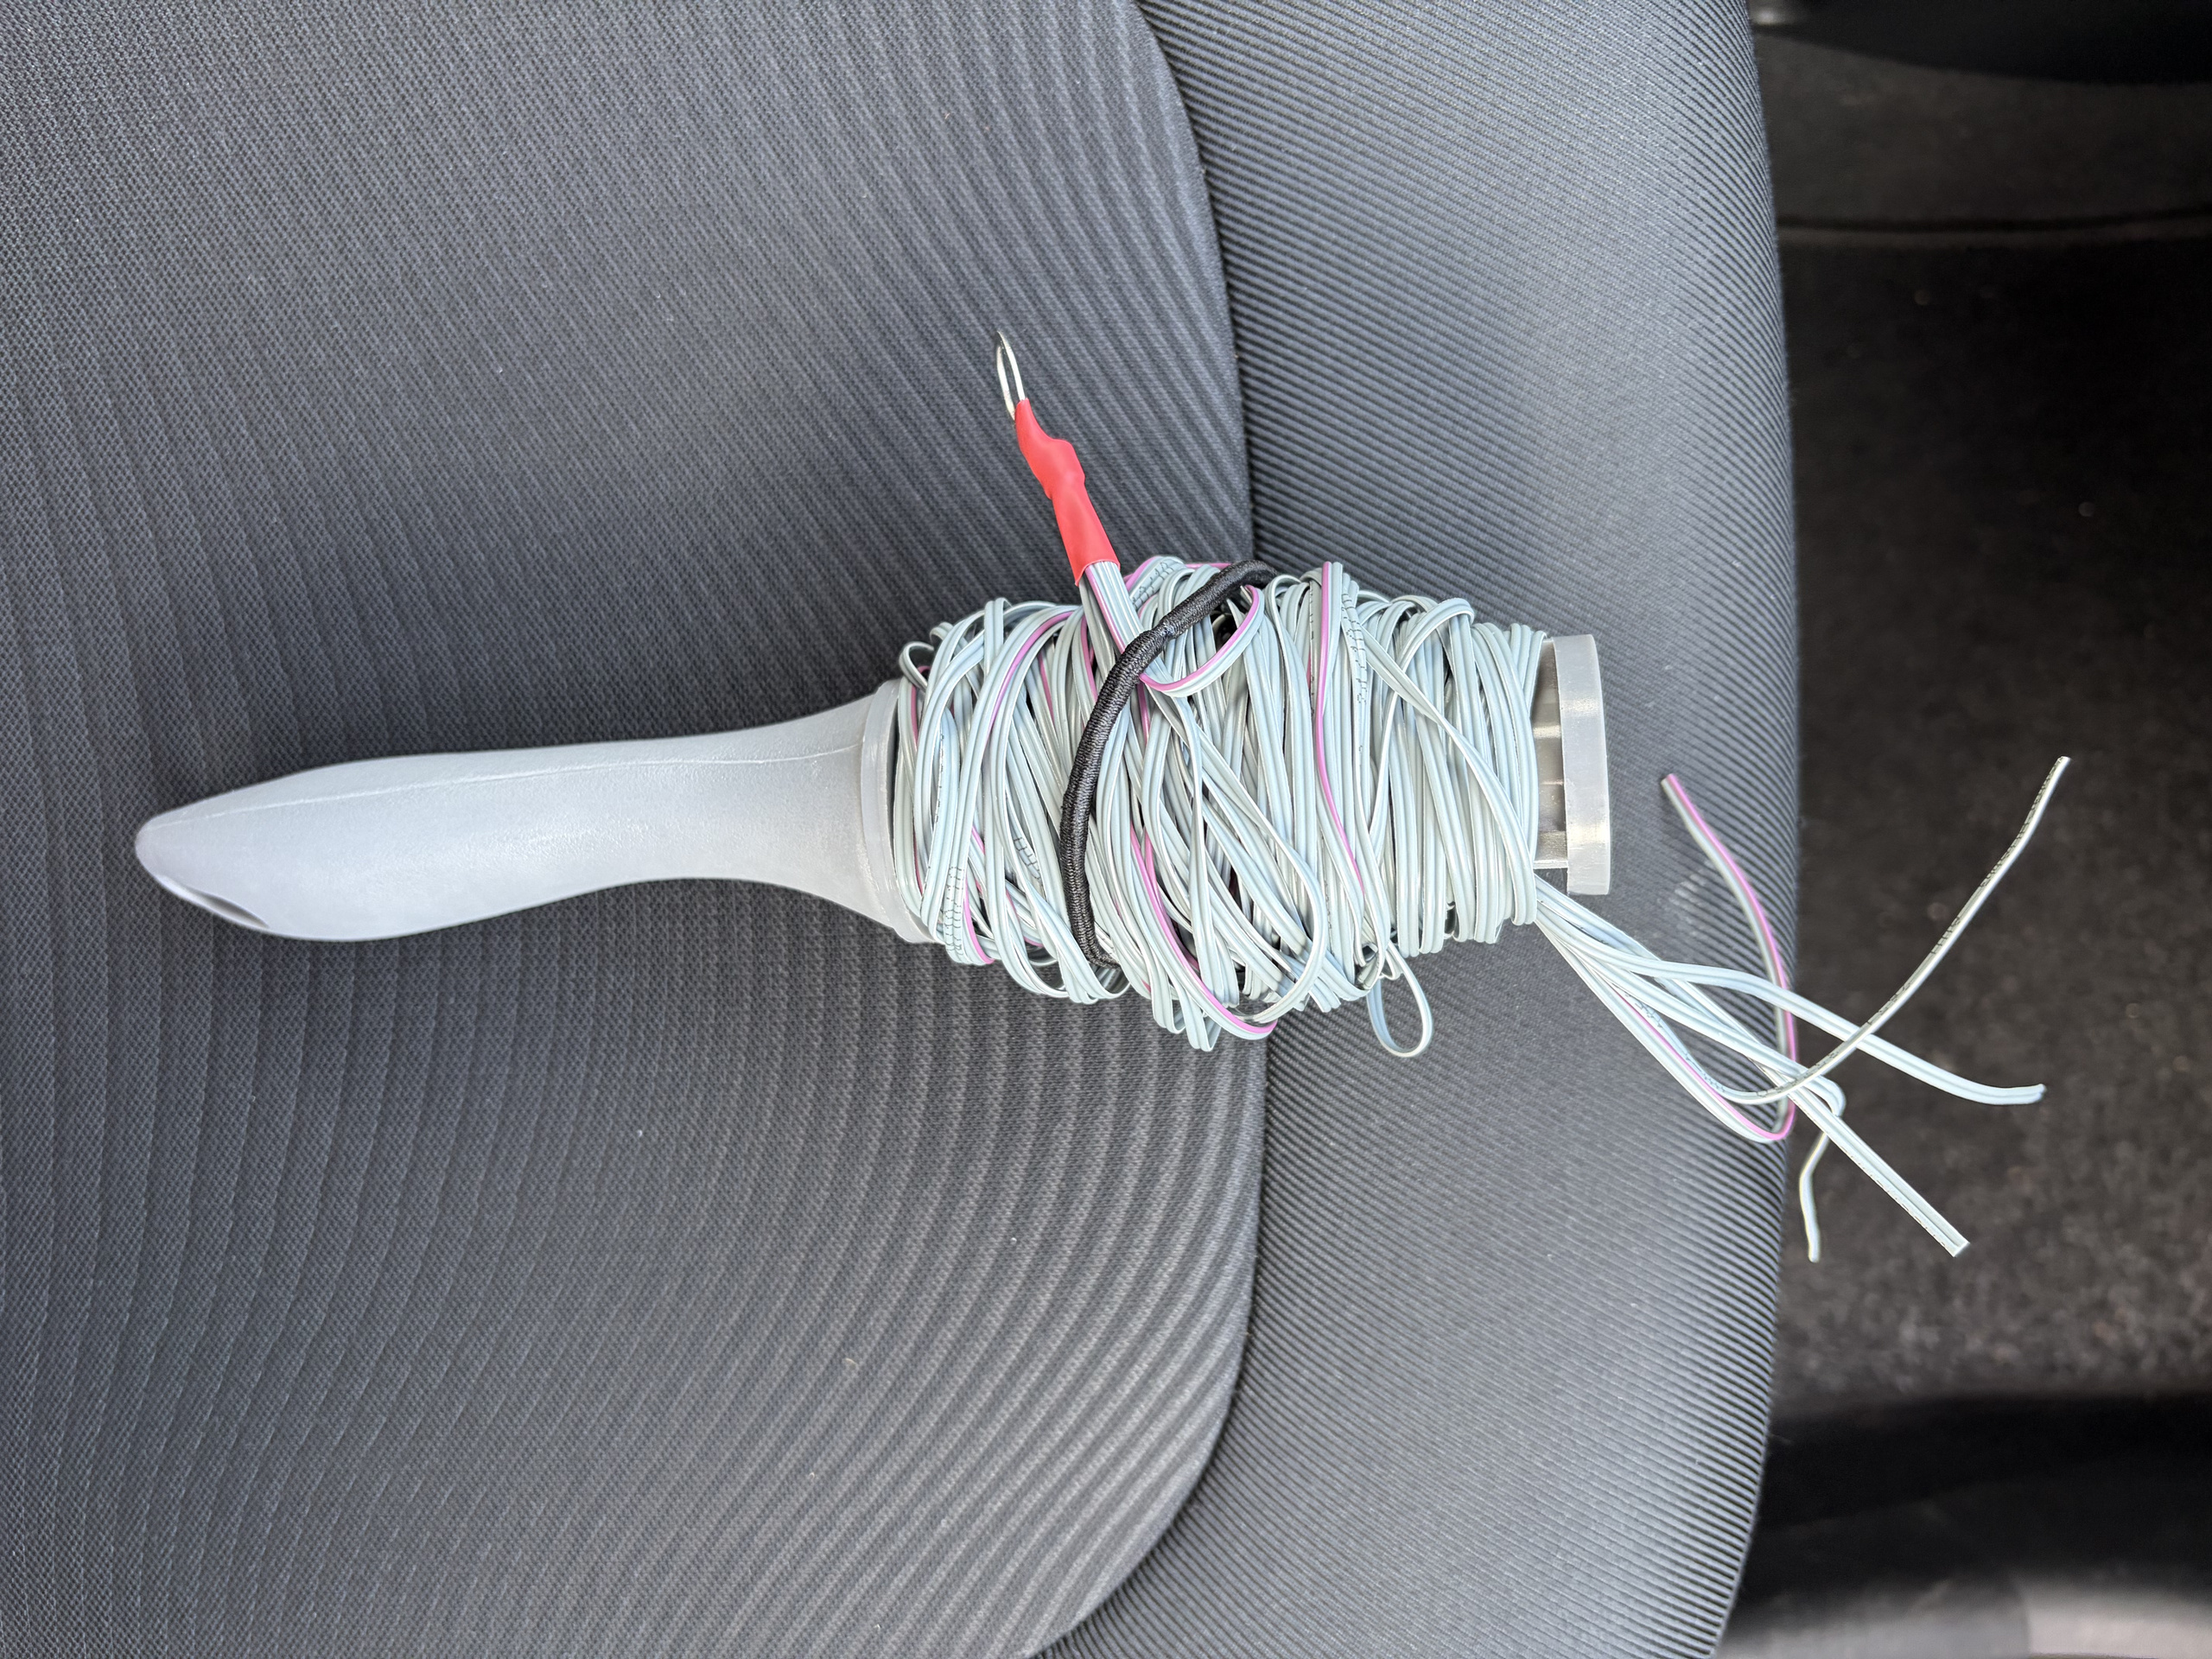
When you’re operating in a forest or an open area, this is relatively straightforward. On a terrace, you may have to be a little more creative with the available space. The length, number and arrangement of radials can influence the SWR and the antenna’s efficiency. It’s also worth remembering that a low SWR doesn’t necessarily mean that an antenna is radiating efficiently. A lossy ground system can sometimes still produce a perfectly acceptable SWR reading.
For my portable operating, I try to keep the setup practical rather than unnecessarily complicated. The main goal is to have an antenna that works well enough for enjoyable contacts and can be packed away again without too much trouble.
Is the JPC-12 a Good Antenna for POTA?
Although my own outings haven’t all been formal Parks on the Air activations, I can certainly see why antennas like the JPC-12 are attractive for POTA operating. POTA involves amateur radio operators visiting designated parks and making contacts with other stations. For a portable POTA activation, especially on HF, an antenna that’s easy to transport and doesn’t require trees or a large installation can be very useful. The JPC-12 has several practical advantages:
- It packs down into a relatively small carrying bag.
- It covers several popular HF amateur bands.
- It can be installed using a ground spike or a suitable alternative support.
- It doesn’t require an external antenna tuner when properly adjusted for the operating frequency.
- It’s suitable for temporary portable setups where quick assembly matters.
I’ve written more about POTA operating and logging, including keeping track of portable contacts for later review.
The same advantages apply to other outdoor radio activities such as camping, field operating and portable SSB contacts. It could also be an interesting option for operators using small QRP radios, provided the antenna is properly matched and the equipment is operated within its ratings.
Of course, the JPC-12 won’t magically perform like a large, full-size antenna installation. On lower bands such as 40 metres, the antenna is electrically shortened and relies more heavily on its loading coil. This introduces compromises compared with a larger, more efficient antenna. But portable radio is often about finding a reasonable balance between size, convenience and performance. And that’s exactly where I think the JPC-12 makes sense.
If you’re planning an actual POTA activation, remember to check that your operating position is inside a designated park boundary and follow the official Parks on the Air rules.
JPC-12 Tripod or Ground Spike – Which Do I Prefer?
Having used both methods, I think they each have their place. The ground spike is probably the simplest option when you’re standing on suitable natural ground. It requires very little additional equipment and makes the antenna easy to install in a field or other open outdoor location.
The tripod is useful when the surface is hard or when you don’t want to push anything into the ground. For me, having both options makes the JPC-12 more versatile. I can use it on the terrace at home or take it into the countryside without changing the basic antenna system. Whichever support I use, I still need to consider the radial arrangement, wind, stability and safe distances from people and overhead power lines.
What I’ve Learned From Using the JPC-12
I’m still learning about HF antennas, propagation and portable operating, and that’s part of what makes amateur radio interesting to me. Every time I take the equipment outside, I learn something new. Sometimes it’s about finding the correct coil setting. Sometimes it’s about arranging the radials or choosing a better location. And sometimes it’s simply about getting more comfortable calling CQ and having a conversation with another radio amateur.
What I particularly appreciate about the JPC-12 is that it doesn’t make getting started unnecessarily difficult. With the setup guide, I can usually find the correct band quickly, make a small adjustment if necessary and get on the air. The fact that I’ve made contacts with stations such as 2I0EVH, IU2EFB and IW2NRI gives me confidence that this relatively simple portable antenna can be a useful part of my HF equipment.
There are certainly more sophisticated antenna systems available. But sometimes the antenna you actually take outside and use is worth more than the perfect antenna you never get around to installing.
Final Thoughts – A Portable HF Antenna I Enjoy Using
For me, the JPC-12 has been a good introduction to portable HF vertical antennas. It’s easy to carry, straightforward to assemble and flexible enough to use in several different situations. From the tripod on my terrace to the ground spike on Samsø and the portable station in the forest, it has already given me some enjoyable amateur radio experiences.
I’m not claiming that it’s the best portable HF antenna available, or that it will outperform a full-size dipole or a carefully designed permanent vertical. But it’s practical, reasonably simple to tune and, most importantly, it has allowed me to make real contacts. And that’s what amateur radio is about for me.
I’m looking forward to taking the JPC-12 on more portable outings, experimenting with different bands and perhaps doing some proper POTA activations in the future. If you’re a new radio amateur looking for a portable HF antenna, or you’re considering a JPC-12 or PAC-12-style vertical for POTA, I hope my experiences give you a useful idea of what the antenna is like to use. Maybe we’ll meet on the air someday.
When I’m operating portable, I also enjoy keeping a record of memorable voice contacts. That’s part of why I developed QSO Transcriber for iPhone — to help follow conversations, review callsigns and signal reports, and keep the QSO audio for later. My page on recording and reviewing ham radio QSOs explains that workflow.
73 from Denmark!
Poul – OV9PL
This article is part of My Ham Radio Journey, where I share my own experiences learning about amateur radio, HF operating, antennas and portable equipment.
Leave a Reply